@datiingurdad: this song

shy
shy
Open In TikTok:
Region: US
Thursday 22 September 2022 23:04:35 GMT
5933
546
3
4

Music

Download

Comments

dramakid03
yu_know_you_cared :
my heart 🥺
2022-09-22 23:31:33
0
obwp_n
ObWp_N :
You’re pretty
2022-09-23 01:31:32
0
dailydoseofn
natalie :
😍😍😍
2022-09-23 17:39:37
0
To see more videos from user @datiingurdad, please go to the Tikwm homepage.

Other Videos

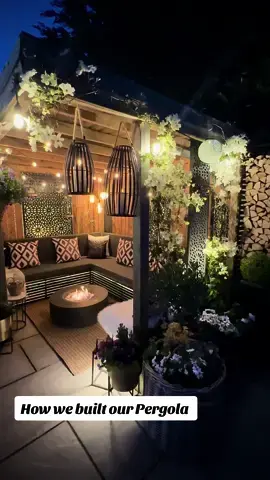
I get asked so many times how we built our Pergola that I thought I’d share with you all as much as possible, how we did it nearly 5 years ago. I hadn’t started this account then so unfortunately I didn’t take any step by step shots. 🙈 Hubbie built a rectangular frame from treated wooden posts, all the same level, same height.  He dug 4 holes and filled with concrete all the same level but below the finished ground level.  Bolted a 90 degree angle bracket to the concrete and fixed it to the bottom of the posts.  The roof rafters, he knotched at one end to create a fall.  The end rafters need to be cut down the full length to make a tapered rafter at the same angle as the knotched rafters.  The fascia is fixed level on 3 sides to give the illusion of a flat roof.  He used tonge and groove roof on top of rafters and then felted with shed felt and the felt can run off the 4th side at the low end of the pitch into a small gutter (if necessary). Only really needed in extremely heavy rain if your sitting inside. If using screens (search online for Composite Garden Screens, widely available in many styles) make sure you use 16mm ones.  He routed grooves out top and bottom and cut the screen slightly bigger than the vertical gap and then bent them in. No nails required.  He used 1/8” 316 Stainless Steel Wire Rope Aircraft Cable kit and I grow Clementis Avalanche up them.  We originally built the frame around our existing garden furniture but recently built our own seating with the decorative black wooden slats with lights behind, and I covered foam with waterproof material.  We light the back of the Screens with floodlights shining up behind them. We added wood panels at the back of the Pergola to hide the old fences behind. We used wood we already had and burnt them using a Japanese method Shou Sugi Ban. See my Instagram account for more details Happy to answer any questions as best I can but hope this helps 😀 x Janice 💙 #garden #backyard #pergola #gazebo #gardeninspiration #gardentransformation #gardenideas #fypシツ #fyp
I get asked so many times how we built our Pergola that I thought I’d share with you all as much as possible, how we did it nearly 5 years ago. I hadn’t started this account then so unfortunately I didn’t take any step by step shots. 🙈 Hubbie built a rectangular frame from treated wooden posts, all the same level, same height. He dug 4 holes and filled with concrete all the same level but below the finished ground level. Bolted a 90 degree angle bracket to the concrete and fixed it to the bottom of the posts. The roof rafters, he knotched at one end to create a fall. The end rafters need to be cut down the full length to make a tapered rafter at the same angle as the knotched rafters. The fascia is fixed level on 3 sides to give the illusion of a flat roof. He used tonge and groove roof on top of rafters and then felted with shed felt and the felt can run off the 4th side at the low end of the pitch into a small gutter (if necessary). Only really needed in extremely heavy rain if your sitting inside. If using screens (search online for Composite Garden Screens, widely available in many styles) make sure you use 16mm ones. He routed grooves out top and bottom and cut the screen slightly bigger than the vertical gap and then bent them in. No nails required. He used 1/8” 316 Stainless Steel Wire Rope Aircraft Cable kit and I grow Clementis Avalanche up them. We originally built the frame around our existing garden furniture but recently built our own seating with the decorative black wooden slats with lights behind, and I covered foam with waterproof material. We light the back of the Screens with floodlights shining up behind them. We added wood panels at the back of the Pergola to hide the old fences behind. We used wood we already had and burnt them using a Japanese method Shou Sugi Ban. See my Instagram account for more details Happy to answer any questions as best I can but hope this helps 😀 x Janice 💙 #garden #backyard #pergola #gazebo #gardeninspiration #gardentransformation #gardenideas #fypシツ #fyp

About