@qhop51: ❝ [#VALENTINO ] ¡! ❞ i think he likes 2 party like a rockstar….||✩ 𝐓𝐀𝐆S ;#HAZBINHOTEL } #FYP ———- #shadowban #hazbinhotelvalentino #fypシ゚viral #trending #blowthisup #edit #viral #hazbinhotelvalentinoedit #valentinoedit #capcutedit #vspedit #editor #capcut #vsp

↺ 𝐪𝐡𝙤𝙥𝟓𝟏 !! ༊  🩷💒
↺ 𝐪𝐡𝙤𝙥𝟓𝟏 !! ༊ 🩷💒
Open In TikTok:
Region: US
Friday 23 February 2024 06:25:59 GMT
344743
34126
0
1416

Music

Download

Comments

There are no more comments for this video.
To see more videos from user @qhop51, please go to the Tikwm homepage.

Other Videos

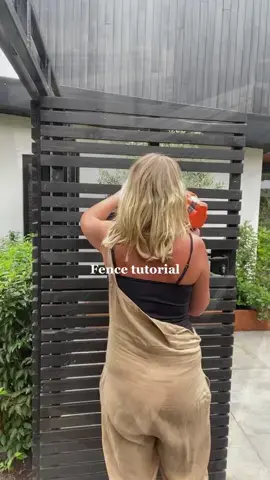
Barbie girls can also use tools! Fence tutorial  You’ll need: Nail gun (saves so much time!) Roofing battons/ pine battons Black @zinsser_uk paint (exterior satin) Tape measure and saw to cut to length. Spacers for consistency (little bits of wood that are the distance you require between the fence panels) . 1. Dig Holes - Measure the distance between the posts as exactly as you can and dig your hole. 2. Paint All Timber - we found it easier to paint before we attached 3. Install The First Fence Post (tip, add some gravel as it helps with drainage) 4. Install all the remaining posts (equal distance apart) 5. You may need to attach one of the end posts to a wall or existing structure 6. Install The Slatted Fence Panels I started from the bottom and worked my way to the top 6. Stand Back And Admire Your New Slatted Fence - (just don’t lean too hard 🤣) 👉🏻The details Our frame is metal and manufactured by a local firm. We dug down deep  and used a concrete mix to keep them in place. Then we attached wooden battons to the frame to allow us to attach the battons horizontal across the frame. Battons are 2x1 (then painted black) Our is approx 7” and we have approx 34 horizontal battons down each section. Once you get into a pattern it’s easy to pick up speed. We also painted ours before attaching to the frame and then a final coat once fixed to the frame. Hope this helps - keep following for more DIY hacks and ideas. #blackfence #fencepainting #fenceinstallation #fencebuilding #fenceideas #diygarden #slattedfence #woodfence #gardenideas #gardendesign #diytutorial #blackfence #fencepainting #cortensteelplanters #fencebuilding #fenceinstallation #diyproject
Barbie girls can also use tools! Fence tutorial You’ll need: Nail gun (saves so much time!) Roofing battons/ pine battons Black @zinsser_uk paint (exterior satin) Tape measure and saw to cut to length. Spacers for consistency (little bits of wood that are the distance you require between the fence panels) . 1. Dig Holes - Measure the distance between the posts as exactly as you can and dig your hole. 2. Paint All Timber - we found it easier to paint before we attached 3. Install The First Fence Post (tip, add some gravel as it helps with drainage) 4. Install all the remaining posts (equal distance apart) 5. You may need to attach one of the end posts to a wall or existing structure 6. Install The Slatted Fence Panels I started from the bottom and worked my way to the top 6. Stand Back And Admire Your New Slatted Fence - (just don’t lean too hard 🤣) 👉🏻The details Our frame is metal and manufactured by a local firm. We dug down deep and used a concrete mix to keep them in place. Then we attached wooden battons to the frame to allow us to attach the battons horizontal across the frame. Battons are 2x1 (then painted black) Our is approx 7” and we have approx 34 horizontal battons down each section. Once you get into a pattern it’s easy to pick up speed. We also painted ours before attaching to the frame and then a final coat once fixed to the frame. Hope this helps - keep following for more DIY hacks and ideas. #blackfence #fencepainting #fenceinstallation #fencebuilding #fenceideas #diygarden #slattedfence #woodfence #gardenideas #gardendesign #diytutorial #blackfence #fencepainting #cortensteelplanters #fencebuilding #fenceinstallation #diyproject

About