@l__zxh: شلون قاواك قلبك رده وصده ؟ ‏مع انه بين عليه الضعف والحاجه #fyp #explore #foryou #ينبع #بحر

𝐴𝐵𝐷𝑈𝑅𝐻𝐴𝐼𝑀.
𝐴𝐵𝐷𝑈𝑅𝐻𝐴𝐼𝑀.
Open In TikTok:
Region: SA
Monday 25 March 2024 02:46:20 GMT
871798
47598
472
6558

Music

Download

Comments

jimmy11y0
B̷a̷s̷m̷a̷✨ :
العين لي جات على تعليقي إن شاء الله ربي يفتحها عليك وين ماتمشي❤
2024-04-19 01:57:46
308
shoug_42
شوق :
يجماعة متى يكون القمر نازل كذا عالبحر ؟ اي يوم من الشهر ؟
2024-03-27 00:18:41
119
f9006f
فيصل :
الحين وين ذا ينبع الغربيه والا ينبع الشرقيه ؟؟؟
2024-03-27 02:59:12
21
rno.a_5
رنا رنوشة :
💜السلام على من رد السلام❤️..
2024-05-18 10:43:22
9
njood6442
جود الجهني 🤍 :
ايش الكام اللي صورت فيه؟
2024-03-25 23:43:15
13
2019reemy
ReeM :
وين بالضبط بينبع؟
2024-03-26 18:27:34
14
cjfihl
Wasn’t🇸🇦 :
الله وين ذا المكان 🥹🥹
2024-03-28 06:26:46
11
matar841
مطـر :
مااااشاء الله يالتصوير تغذيه بصريه 🤍🍃
2024-04-03 00:12:07
5
a.arm.7
a.arm.7 :
اسم الموسيقى
2024-05-04 11:27:39
8
zdeel_
Za 🎓 :
هالمكان وشخصً توده 😢😢😢😢😢
2024-03-28 18:46:39
12
on.fire111
🐈‍⬛ :
من جدة يقصد من مدينة جده؟ ولا منجده ؟
2024-04-14 21:51:38
8
gi.xl3
ً :
اهخخخ يا جمال ينبع ❤️
2024-03-29 17:03:15
10
krrrz.z
ميـان آل علي :
ماشاء الله المنظر يسر الخاطر 😍
2024-03-26 23:06:09
10
veo3l
²¹ :
لا يوقف تصويرك 🤍
2024-03-26 21:56:49
9
nxi33k
𝑵𝑨𝑫𝑨🌷 :
المقطع اخذ قلبي بقوووووههه تبارك الله يالهدوء 🥺❤️
2024-03-27 19:07:10
8
ashwaqa22
شُوقا 🪻 :
اجمل فيديو نختم يومنا فيه ماشاء الله 🙏🏻
2024-03-27 04:30:13
8
sasdpqjb.88
Nawara :
كيف التصوير ما شاء الله يجي كذا مره حلو
2024-03-27 20:15:46
7
ddwt_9
D ⋆౨ৎ :
مافيه زي بحر ينبع ❤️
2024-03-26 22:14:06
7
njoud_660
jojo’’ :
التصوير فنان بالله كيف كذا
2024-03-26 17:55:13
7
k5ej
4nf :
بأخذ الفديو👍
2024-03-27 00:11:11
6
xctr_7
Rancy :
أسال نفسي :إذا كذا الدنيا كيف الجنه😔؟
2024-03-30 22:22:20
11
xiifn6
نجمة☆ :
وشلون😢.
2024-03-29 02:14:49
8
atherh.23
𝘈𝘛𝘏𝘌𝘌𝘙. :
ينبع
2024-03-25 05:53:10
8
user4710954063320
❤️‍🩹 :
وين المكان💔😔
2024-06-09 16:24:12
3
To see more videos from user @l__zxh, please go to the Tikwm homepage.
Other Videos

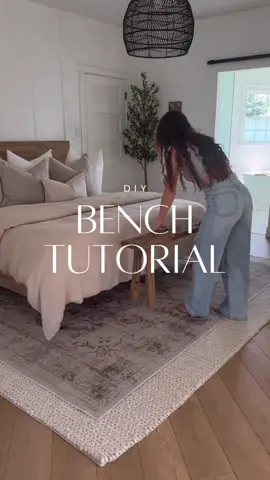
I’ve been getting a lot of questions lately about my narrow bench, and I’m excited to reshare the tutorial with you all. the best part is, you can make it yourself for just $50! what you’ll need—  2 x 8 x 8’ knotty pine  saw sand paper  chisel hammer wire brush  reciprocating saw (optional) wood glue screws matte polyurethane  stain of choice  steps—  STEP ONE: CUTTING THE WOOD Using my mitre saw I cut my lumbar in half to give me two 4’ pieces. Set one aside as it will be used for the top of the bench. Using a table saw or circular saw cut the second piece into… 4x — 17” x 2.5” pieces (legs) 2x — 4” x 2.5“ pieces (bottom support) 2x — 2.5” x 2.5” pieces (top support) using your mitre saw cut a 5 degree angle on all 4 legs and bottom support and top support pieces. STEP TWO: AGING THE WOOD  using my chisel, hammer, wired brush and reciprocating saw I distress the wood to my liking.  once I was happy with the distressing I sanded all the pieces with a 60 grit, then 80 grit and finished it off with 120 grit sandpaper. STEP THREE: BUILDING THE BENCH  I created two “A” shape using 1 top support, 1 bottom support and 2 legs. I secured the “A” frame with wood glued and screws.  next I took my A” shaped legs and attach them to the bottom of the bench using glue, and screws.  STEP FOUR: STAINING  first coat: simply white second coat: early American  next I took a handful of dirt and rubbed it all over the top of the bench. Why? I don’t know 😂 but it made the wood look even more distressed!  after the stain has cured for a day apply a coat of polyurethane.    follow me for more diys, home decor and styling inspo!  • • • #DIY #diyhomedecor  #diyprojects  #diyideas  #diybig  #diybench  #homedecor  #simplediy  #diytutorial  #diyfurniture  #diyhome  #bedroomdecor  #ilovediy  #masterbedroom #doityourselfproject #neutraldecor
I’ve been getting a lot of questions lately about my narrow bench, and I’m excited to reshare the tutorial with you all. the best part is, you can make it yourself for just $50! what you’ll need— 2 x 8 x 8’ knotty pine saw sand paper chisel hammer wire brush reciprocating saw (optional) wood glue screws matte polyurethane stain of choice steps— STEP ONE: CUTTING THE WOOD Using my mitre saw I cut my lumbar in half to give me two 4’ pieces. Set one aside as it will be used for the top of the bench. Using a table saw or circular saw cut the second piece into… 4x — 17” x 2.5” pieces (legs) 2x — 4” x 2.5“ pieces (bottom support) 2x — 2.5” x 2.5” pieces (top support) using your mitre saw cut a 5 degree angle on all 4 legs and bottom support and top support pieces. STEP TWO: AGING THE WOOD using my chisel, hammer, wired brush and reciprocating saw I distress the wood to my liking. once I was happy with the distressing I sanded all the pieces with a 60 grit, then 80 grit and finished it off with 120 grit sandpaper. STEP THREE: BUILDING THE BENCH I created two “A” shape using 1 top support, 1 bottom support and 2 legs. I secured the “A” frame with wood glued and screws. next I took my A” shaped legs and attach them to the bottom of the bench using glue, and screws. STEP FOUR: STAINING first coat: simply white second coat: early American next I took a handful of dirt and rubbed it all over the top of the bench. Why? I don’t know 😂 but it made the wood look even more distressed! after the stain has cured for a day apply a coat of polyurethane. follow me for more diys, home decor and styling inspo! • • • #DIY #diyhomedecor #diyprojects #diyideas #diybig #diybench #homedecor #simplediy #diytutorial #diyfurniture #diyhome #bedroomdecor #ilovediy #masterbedroom #doityourselfproject #neutraldecor

About